How To Move Content From Medium to WordPress
Are you looking to move content from Medium to WordPress? You’ve come to the right place. Let me walk you through the process.


There are many reasons you might want to move your content from Medium to WordPress. Maybe you want to build out your website and include everything you’ve written on Medium. Perhaps you want a copy of everything you’ve written in case Medium one day shuts down. Regardless of the reason, moving content from Medium to WordPress takes time and patience. Once complete, you’ll have a complete copy of your Medium archive on your own WordPress-powered website.
Background
A few months after moving into full-time freelance writing, I redeveloped my website. I wanted better search engine optimization and lead generation. Part of the website redevelopment included expanding my blog. Everything I write publicly, regardless of site or platform, now exists under a single roof that I own and control.
No, I am not leaving Medium. My content will live both on Medium and my website. Yes, there are potential SEO implications of having content in multiple places. So far, however, my strategy is working, and my website is generating more searches and initial communication requests.
Before moving into the specific steps necessary to move content from Medium to WordPress, let’s go through a quick checklist of everything you need to proceed.
Medium Account
To move content from Medium, you must-have content to move. I’ll assume you have an active Medium account and are logged in. That’s the main prerequisite here.
WordPress.com Account
When moving content to WordPress, you have two options: self-hosted on your web server or WordPress.com. WordPress.com is the free, platform-hosted version of the software. Regardless of the final destination for your Medium content, you need an active WordPress.com account.
WordPress Installation
My website is a self-hosted WordPress installation on a Dreamhost server. I’ve used Dreamhost for years for other projects and am happy with their support and features for the price. While I love the simplicity of Carrd, it cannot install WordPress or run the complexities needed for my new website.
Where you choose to host WordPress is up to you. If you are not going the self-hosted route and sticking with WordPress.com, you can obviously skip this step.
With the checklist complete, you’re ready to start moving content. Buckle in; this will take some time.
Step 1: Download From Medium
Before you can move content from Medium to WordPress, you must download it from Medium. Thankfully, this is one of the easiest steps involved in the entire process.

Visit your Medium settings and scroll to the Account section. Click Download .zip, and the Medium servers will begin preparing a download of everything you’ve published and all of your unpublished drafts. How long Medium takes to generate the file depends on how many things you’ve published. Once ready, Medium sends an email to click a link and download the file.
Inside the file is a folder structure with .html copies of all your Medium stories. Unfortunately, this format is not something self-hosted WordPress installations import. So, regardless of which version of WordPress you’re using (self-hosted vs. WordPress.com), you must first move everything to a WordPress.com account.
Step 2: Import To WordPress.com
Login to WordPress.com and create a new blog. For now, I suggest you set the blog to private, even if this is the final destination for your content.
WordPress.com has a fantastic import tool with options for many major platforms, including Medium. Moving from Medium to WordPress.com is as easy as importing the .zip file from Medium. Depending on the number of Medium posts, the import can take some time. You’ll receive an email when everything is complete and ready to go. Unfortunately, the simplicity of this step is also what makes it tremendously frustrating.
Medium exports everything you’ve ever created on the platform. Responses? Check. Drafts? Check. Hidden posts? Check. When Medium content imports to WordPress.com, everything becomes blog posts. The original publish date, time, tags, and status all remain, but every response is now an entire post. This all-or-nothing status is why I initially recommended setting your WordPress.com blog status to private.
Step 3: Fix Everything
Once everything imports, you have some more work to do.
Step 3a: Delete Unwanted Content
Now that every response you’ve ever published on Medium is a blog post, I’m sure you want to go in and delete them. You may also have old posts you don’t want to import to the new site. That’s up to you.
WordPress.com doesn’t make this easy. There is no bulk-editor option for the free, platform-hosted version of the software. Your best option here is deleting every unwanted post one at a time.
If you are tech-savvy and understand basic HTML and XML formatting, there is another option. If that scares you, delete everything one at a time on the WordPress.com website.
Step 3b: Reformat Everything
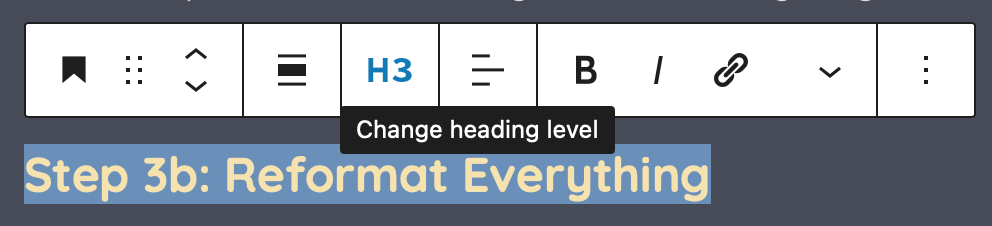
Search engine optimization relies on a hierarchy outline structure for blog posts. H1 is the highest level of content (often the title), followed by subheadings (H2). If that subheading more subs, like Step 3b above, they are H3 titles. This structure continues down to H6 titles.
In all its wisdom, Medium exports content where the title is in H1 and all first-level subheadings are in H3. So, everything just imported to WordPress is missing an H2 subheading. Granted, if your WordPress theme doesn’t break with missing H2 titles, and you don’t care about SEO hierarchy, this isn’t a big deal. If, however, you do, then you’ve got work to do.
Unfortunately, like with the deletion step, the only viable option here is going into every post and making changes. Though, like with the previous step, there is a more technical option.
Step 3c: Edit The XML File
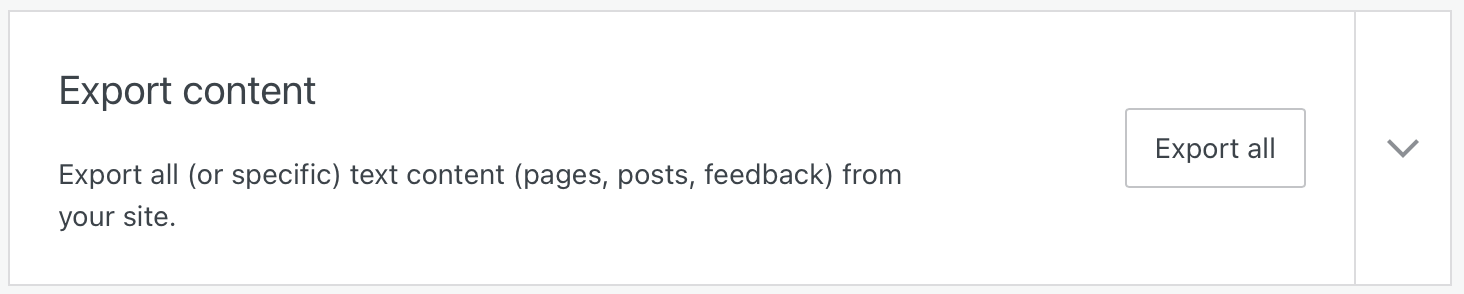
Thankfully, exporting from WordPress.com does not create individual .html files for each post. It generates a single XML file containing everything. If you understand the code and are comfortable making changes, you can edit the file directly.
I went through the code and deleted entire posts I didn’t want to be included, all the responses and drafts. I also changed some tags using find and replace.
Before you go down this route, let me give one gigantic word of warning. One typo or unclosed HTML tag will render the entire XML file useless. Do not go editing the file unless you know what you’re doing. Though, if you are comfortable, this is much easier than using the WordPress.com interface.
If you are sticking with WordPress.com, once you edit every post, you’re done. If you edited the XML file, you now want to re-import the file. Though you should import to a new WordPress.com blog, otherwise, there could be conflicts. If, however, you’re moving onto a WordPress.com blog, your work is not over yet.
Step 4: Move To Self-Hosted WordPress
If you edited the XML file directly in the previous step, you’re ready to move on. If not, go to the WordPress.com export options and export. You’ll receive a single file ready to import into your self-hosted WordPress installation.
Once the XML file downloads, open your self-hosted WordPress import options and install the WordPress option. Again, we couldn’t go straight here because self-hosted WordPress installations do not allow imports using Medium’s files. It isn’t straightforward, I know.

With the WordPress import plugin installed, point it toward your XML file and let it start working. Again, depending on how many posts, this could take some time.
Assuming you made all of your desired edits in the previous step, at this point, your content is more or less finalized. If you did not, self-hosted WordPress installations have bulk-editing and bulk-deletion tools, making some purging easier.
Step 5: Upload Images
There are a few final steps you can choose to take to clean up your media content. By default, all images exported from Medium and imported to WordPress still point to the original Medium upload. So, any image doesn’t actually live on your website but Medium. While Medium has great servers, additional server requests can slow down your website. If the goal is to move content from Medium to WordPress, relying on Medium for media hosting is problematic.
WordPress makes resolving this issue easy once you’re in the individual post editor. Click on the image in question, and an upload icon appears in the toolbar. Click the button, and WordPress does its thing, uploading the image to your Media Library and correcting the link references.
Yes, this is a pain. I had around 300 posts to correct and upload images for. It took a few weeks, working on a few posts at a time. I also added the Title, Alt, Caption, and Description for each image in the Media Library during this process. But that isn’t necessary, though it does help to make images easier to find in the Library.
Conclusion
Regardless of why you might want to move content from Medium to WordPress, the process requires time and patience. Things will import you didn’t remember writing. Responses that said “great post” will become sad, two-word blog posts. You’ll need to spend time correcting everything to make anything useful.
However, once you go through the hassle of correcting everything, you’ll have a full copy of Medium on WordPress. Now, I publish on my website and then import to Medium. It is MUCH easier moving from WordPress to Medium than the other way around.
Related Reads

It’s the End of the Year as We Know It (and I Feel Tired)
This Just In: It’s time to look back at the year that was and set up some hopes and dreams for the year to come, or something like that.

Is Substack Really That Bad?
This Just In: Stop launching your new blog on Substack.

How to Move to Ghost In 2025
This Just In: Own your own publication by launching a website running Ghost. It’s not as difficult as it sounds.

My Ghostly Strategy: Avoid the Graveyard
This Week In Writing, we fully explore how I’m building Ghost into a self-hosted content hub and how you can too.

My Return to Journaling Failed Miserably
This Week In Writing, we talk about good intentions, rumored Apple products, and buying domain names

We Have to Talk About Substack
This Week In Writing, we talk about Diffusion of Innovation Theory and dying platforms.

This Is a Bit Revealing
This Week In Writing, I reveal my inner nerd by sharing a personal project. Plus, we look at character creation.

The Stats I Track
This Week In Writing, we explore which stats are necessary to track and which are safe to ignore.

Write Now is My Tribe of Mentors
What I learned from Tim Ferriss’ Tribe of Mentors and my answers to his 11 great questions.

Make Your Writing Space More Comfortable
This Month In Writing, we explore simple ways to improve your writing space and the best advice published in June.
How I Edit and Manage The Writing Cooperative
What writers and editors can learn from my experience editing The Writing Cooperative, one of Medium’s top publications

My Best Advice for Writers: LIVE!
Next week, I sit down with Sinem Günel to discuss writing, my book, and how you can stay encouraged even when life gets in the way.

Let’s Get Acquainted
This Month In Writing, I introduce myself and explore the future of The Writing Cooperative.

Stop Using Emotional Manipulation and Poverty Porn When Marketing Nonprofits
Nonprofit marketing tells a great story without emotional manipulation and poverty porn. Learn more in my interview with ViralContentBee.

Should You Go With The Flow?
Beautiful email marketing, automation, and workflows for a fraction of the cost? Is Flodesk too good to be true?

Should You Give It The Gusto?
Getting paid as a freelancer is great, but paying yourself is even better. Is Gusto the right choice to make that happen?

Can Bonsai trim time for freelancers?
Does the host of freelance-focused features make Bonsai the ideal tool for writers to shape their business? Let’s find out!

Why It's Important To Support Each Other
Just like buildings, people need support. We need others who prop us up and hold us together. Here’s how you and I can support each other.

How To Move Content From Medium to WordPress
Are you looking to move content from Medium to WordPress? You’ve come to the right place. Let me walk you through the process.

Level Up Your Productivity Through Budgeting
Do you know where your money goes? What about your time? Here are four rules for better writing.

Breathe in. Breathe out. Move on.
Are you burnt out? You’re not alone. Take some advice from Jimmy Buffett: Breathe in, breathe out, move on.

Write Now with Amy Weintraub
How a yoga instructor and novelist takes ideas from napkins to the printed page

Write Now with John Perkins
How a near death experience led to a New York Times bestselling career

Write Now with John Bishop M.D.
How a retired orthopedic surgeon creates stories based on career experiences

Want To Be A Successful Writer? Believe In Yourself.
We buy into lies every day that erode our confidence and prevent us from finding success

Write Now with Kristin Wong
How this writer breaks up every piece into four parts

How I Write From Home
Invest in your comfort and your productivity will increase

Choosing Growth Over Fear In A Time Of Uncertainty
NASA's process of landing on the moon can teach us to start choosing growth when things are hard. Tackle little things one at a time.

How To Be A Professional Freelance Writer: Invest In Yourself
Today I have some advice for anyone looking to launch a career as a freelance writer: invest in yourself. You are worth it!

Write Now with Michael McAuliffe
How a former State Attorney and Federal Civil Right’s Prosecutor published a novel thirty-years after forming the idea

Write Now with Scott P. Southall
How an international banking executive finds time to write middle grade fantasy

Pitch Slapped: How to Properly Pitch Publications
Let’s look at a few ways to pitch without causing the publication to delete your request.

What I Learned About Writing From My Film School Friends
It’s about more than storyboards.

Why be Perpendicular When You Can be Parallel?
As the song says, you get three as a magic number. But what you also get is a perfect example of parallel structure.

Building The Writing Cooperative: How Internet Strangers Developed a Writing Community
Despite its massive size, The Writing Cooperative started with just two people who never met.

So, You’re New to Medium…
Are you new to Medium? Do you want to make the most of your new account and start writing and making money? This is the guide you need.

It’s Not All About the Benjamins
This Just In: Yet one more thing that Diddy was wrong about.

Answers to a Few Questions
This Just In: There were fewer questions than I anticipated, but I will answer them nonetheless.

What Questions Do You Have
This Just In: I won’t be participating in Medium Day this year, but I still want to keep the spirit alive. Ask me anything.

Advice for Medium Writers Choose Publications Wisely
Just because you CAN submit to a specific publication doesn’t mean you SHOULD.
Medium Day 2024: Questions I Didn't Have Time to Answer
A collection of all the questions I didn’t have time for during my 30-minute Medium Day presentation.

What Is Your Freelance Writing Rate
Writing jobs are evaporating for many reasons, but freelance rates were really bad long before AI came around.

Celebrating a Decade on Medium
Looking back at the past ten years of writing on Medium and what comes next.

Why Is Branding So Difficult?
This Just In: This Week In Writing rebrands; still explores the world with creativity and curiosity.

It’s Time We Discuss Medium
This Week In Writing, we address the platform that has supported my writing for nearly a decade.

How I Feel About Engagement Numbers
This Week In Writing, we discuss what engagement means and if I get discouraged by a perceived lack thereof. Plus, a look at the future (again).

Your Questions Answered
This Week In Writing, we recap a successful Medium Day and address some of the questions I didn’t have time to answer.

Saving Frequently Isn’t The Only Way To Backup Your Writing
This Week In Writing, we take a hard lesson from the latest Twitter/X hijinks. Plus, we look at what “human writing” means.

I Don't Want to Talk to You on WhatsApp
This Week In Writing, we address an impersonation issue, talk about scammers, and settle a Mastodon issue.

The Era of Centralized Platforms Is Over
This Week In Writing, we discuss whether you should still own a website if you publish on Medium or Substack.

Let’s Talk About Money
This Week In Writing, we talk about earning money as a writer online and check in on NaNoWriMo.

This Just In: Thank You, Subscribers
I don’t know who you are, but I’m grateful for your support, and I hope you enjoy all the things you read.
How I Edit and Manage The Writing Cooperative
What writers and editors can learn from my experience editing The Writing Cooperative, one of Medium’s top publications

You Should Be on Twitter
This Week In Writing, we explore how I’m shocked how many writers don’t take advantage of Twitter’s potential for writers.
Let’s Get Acquainted
This Month In Writing, I introduce myself and explore the future of The Writing Cooperative.

Making Money Online Is Overrated
Everyone expects you to monetize your online growth, but should that be the ultimate goal?

Let’s Talk About Tags
This Week In Writing, we explore Medium’s new design, selecting the best tags, and how to be humble as a writer.

What is Fairy Bread?
https://justincox.medium.com/what-is-fairy-bread-663aaf221584
How To Move Content From Medium to WordPress
Are you looking to move content from Medium to WordPress? You’ve come to the right place. Let me walk you through the process.

Do You Judge A Book By Its Cover?
📝 This Week’s Goal: Consider the cover art for your next project before marking anything complete.
Building The Writing Cooperative: How Internet Strangers Developed a Writing Community
Despite its massive size, The Writing Cooperative started with just two people who never met.
So, You’re New to Medium…
Are you new to Medium? Do you want to make the most of your new account and start writing and making money? This is the guide you need.

I Am Not Entitled to Internet Fame and Fortune
And Neither Are You

Why I’m Not Leaving Medium
Quitting Medium seems to be all the rage these days.

How Not to Reach 25,000 Followers and Make Money on Medium
There is no silver bullet.
The Stats Matter
I was looking at the whole thing wrong.
It’s the End of the Year as We Know It (and I Feel Tired)
This Just In: It’s time to look back at the year that was and set up some hopes and dreams for the year to come, or something like that.
It’s Not All About the Benjamins
This Just In: Yet one more thing that Diddy was wrong about.

The Internet Was Doomed From the Start
This Just In: Maybe it’s time to rethink the entire internet.
Answers to a Few Questions
This Just In: There were fewer questions than I anticipated, but I will answer them nonetheless.
What Questions Do You Have
This Just In: I won’t be participating in Medium Day this year, but I still want to keep the spirit alive. Ask me anything.
What I Did Different With This Book
This Just In: Launching a second edition wasn’t as simple as I thought it’d be, and I learned some lessons along the way.
Introducing Write Now’s Revised Second Edition!
This Just In: You can now access everything I’ve learned writing online over the last two-plus decades. Are you ready for it?

Can We Talk About Comments?
This Just In: Hearing from readers is a lot of fun until you start to get spammed with bots and AI nonsense farming for attention.
Is Substack Really That Bad?
This Just In: Stop launching your new blog on Substack.
How to Move to Ghost In 2025
This Just In: Own your own publication by launching a website running Ghost. It’s not as difficult as it sounds.

The Cost of Simplification
This Just In: Owning your own platform can be complicated and sometimes simplifying can be costly.

The Perils of Personal Platforms
What does it actually mean to leave the world of commercial platforms behind?

What Happens When Everything is Paywalled
This Just In: Wealth is becoming a determining factor in the type of World Wide Web you can access. And I’m not talking about speed.

Platforms Are Getting Much Worse
This Just In: Platforms want us to know exactly who controls the internet. It’s not us, but it can be!

Hitting the Reset Button
LLM scraping is a virus eating up the internet, but I’m done fighting. Instead, I choose open access and human connection.
Advice for Medium Writers Choose Publications Wisely
Just because you CAN submit to a specific publication doesn’t mean you SHOULD.
Medium Day 2024: Questions I Didn't Have Time to Answer
A collection of all the questions I didn’t have time for during my 30-minute Medium Day presentation.

Is Generative AI Destroying the Open Web
Subscription walls prevent AI scraping, but at what cost? I’m rethinking my whole publishing strategy.

The Downside of Personal Platforms
Creators need to think carefully about their personal sites and build in a way that prevents link rot.

Share, But Don’t Spoil
A more personal internet relies on user recommendations but doesn’t spoil their experience.

Metrics Don’t Matter
Have we become so accustomed to seeing metrics everywhere that they no longer mean anything?
Celebrating a Decade on Medium
Looking back at the past ten years of writing on Medium and what comes next.

Don’t Take My Word for It
This Just In: Personalized recommendations are the new algorithms and the best way to build a true audience.

Don’t Feed the AI Beast
This Just In: Justin’s writing requires a subscription to prevent AI abuse; consider your own precautions.

Sending Emails Is Hard
This Just In: Google and Yahoo crack down on bad behavior; set your DKIM, DMARC, and SPF records now.
Why Is Branding So Difficult?
This Just In: This Week In Writing rebrands; still explores the world with creativity and curiosity.

Why Make Anything if You Don’t Think It Will Be Great?
This Week In Writing, we discuss greatness and how chasing it is a possible and noble goal.

Pay People Not Platforms
This Week In Writing, we look at why Substack’s collapse is actually a good thing for paid newsletters.

Let's Make the Internet Personal Again
This Week In Writing, we look at the once-in-a-generation opportunity to create a new internet filled with fun and originality.

Raising the Bar at the Writing Cooperative
This Week In Writing, we look at changes to our publication standards and what they mean for you.
It’s Time We Discuss Medium
This Week In Writing, we address the platform that has supported my writing for nearly a decade.

My First Year on Mastodon and the Future of Social Media
This Week In Writing, we look back at how social media fractured and why it’s a good thing for us all.

The Economics of a Self-Hosted Newsletter
This Week In Writing, we talk about what happens when you eliminate platforms and go after it on your own.

Trick or Treat?
This Week In Writing, we talk about pen names and whether they make sense for writers.

A New Era Begins
This Week In Writing, we explore the internet’s current metamorphosis and how you can be part of the revolution.

My History of Blogging
This Week In Writing, we celebrate the blog, explore the pendulum of online writing, and double down on quality.
How I Feel About Engagement Numbers
This Week In Writing, we discuss what engagement means and if I get discouraged by a perceived lack thereof. Plus, a look at the future (again).

My Writing Is About Building Community
This Week In Writing, we highlight some of the people I’ve met writing online and answer some of your questions.

It’s Time for a Fresh Start
This Week In Writing, we talk about new Apple products, home renovations, and changes to the newsletter.

Choose Your Own Design
This Week In Writing, we explore the wonderful world of blogs, where writers truly get creative.
Your Questions Answered
This Week In Writing, we recap a successful Medium Day and address some of the questions I didn’t have time to answer.

Do CTAs Even Work Anymore?
This Week In Writing, we explore the “necessary evil” of calls to action and ask if they are any better than tacky banner ads.
My Ghostly Strategy: Avoid the Graveyard
This Week In Writing, we fully explore how I’m building Ghost into a self-hosted content hub and how you can too.

Another Platform Collapses
This Week In Writing, we talk about Reddit and what it means for centralized communities moving forward.

This Just in Comes Home
Welcome to the first issue of This Just In completely managed from my website!

Let's Talk About Numbers
This Week In Writing, we talk about the importance of metrics and why I barely pay attention to mine.

How Not To Approach an Editor
Plus, here is an update on my participation in Medium’s Boost program and how not to approach an editor.

We Have to Talk About Platform Proliferation
This Week In Writing, we ask why no platform is content on doing one thing well and instead want to do all things poorly.

On Tennis and Writing Breaks
This Week In Writing, I discuss my prolonged break from daily writing and follow up on last week’s Substack article.
We Have to Talk About Substack
This Week In Writing, we talk about Diffusion of Innovation Theory and dying platforms.

Stop Creating Quantity and Start Creating Quality
This Week In Writing, we discuss Medium’s new Boost program and why the vast majority of submissions lately have been atrocious.
The Era of Centralized Platforms Is Over
This Week In Writing, we discuss whether you should still own a website if you publish on Medium or Substack.

Are You Begging for Eyes in the Attention Economy
This Week In Writing, we explore the internet’s move away from the attention economy and how writers can make the web more personal
Let’s Talk About Money
This Week In Writing, we talk about earning money as a writer online and check in on NaNoWriMo.

Happy Author’s Day
This Week In Writing, we kick off NaNoWriMo by celebrating all the author’s out there, whether published or not.
This Just In: Thank You, Subscribers
I don’t know who you are, but I’m grateful for your support, and I hope you enjoy all the things you read.
The Stats I Track
This Week In Writing, we explore which stats are necessary to track and which are safe to ignore.

Eat Your Words is This Just In (Again)
Reboots are in now, right?
My Best Advice for Writers: LIVE!
Next week, I sit down with Sinem Günel to discuss writing, my book, and how you can stay encouraged even when life gets in the way.
How To Write and Publish a Book for Less Than $500
https://writingcooperative.com/how-to-write-and-publish-a-book-for-less-than-500-e72fba696591

I Wrote a Book!
This Week In Writing, I announce my new book and provide an update on the Flash Fiction Writing Challenge!
Let’s Get Acquainted
This Month In Writing, I introduce myself and explore the future of The Writing Cooperative.

Changing Lanes
Eat Your Words is evolving. Kind of.
Making Money Online Is Overrated
Everyone expects you to monetize your online growth, but should that be the ultimate goal?
Let’s Talk About Tags
This Week In Writing, we explore Medium’s new design, selecting the best tags, and how to be humble as a writer.

Wondering Where Our Newsletter Went?
This Month In Writing, we’re brewing a mug of hot chocolate to enjoy while reading some of your best stories.

Do You Write Short-Form Content?
This Week In Writing, we bundle up for the longest night of the year by exploring writing’s shortest form.

Want To Get Your First 100 Followers?
This Week In Writing, we look at how to get your first 100 followers and start building an audience of dedicated readers.

Long-Haul Writing and The Art of Patience
Are you a long-haul writer, or does low engagement scare you into immediate action? Writing requires dicipline and willpower to stick around.
How To Move Content From Medium to WordPress
Are you looking to move content from Medium to WordPress? You’ve come to the right place. Let me walk you through the process.
Do You Judge A Book By Its Cover?
📝 This Week’s Goal: Consider the cover art for your next project before marking anything complete.

Let’s Talk About Follower Counts
Do you know how many of your followers are fake? Chances are, it’s a lot more than you think. As a result, following numbers are useless.

Will Anyone Read Your Writing?
📝 This Week’s Goal: Explore all options when considering where and how to publish your writing.

A Newsletter About Newsletters
📝 This Week’s Goal: Consider launching a newsletter to better connect with your audience

Looking Back At The Year That Was
A collection of things I’m proud of from an otherwise horrible year, plus a look at what’s to come

What is Blogging, Anyway?
No, really, will someone tell me?

To Publish Regularly Or Irregularly, That Is The Question
What’s better? What works?
Building The Writing Cooperative: How Internet Strangers Developed a Writing Community
Despite its massive size, The Writing Cooperative started with just two people who never met.

How to build a following and develop a successful personal brand.
You won’t like the answer.
So, You’re New to Medium…
Are you new to Medium? Do you want to make the most of your new account and start writing and making money? This is the guide you need.

How To Write Blog Posts That People Actually Read
Let’s give the people what they really want.
I Am Not Entitled to Internet Fame and Fortune
And Neither Are You

Seeking Validation
Just Click the Heart Button Already
Why I’m Not Leaving Medium
Quitting Medium seems to be all the rage these days.
How Not to Reach 25,000 Followers and Make Money on Medium
There is no silver bullet.
The Stats Matter
I was looking at the whole thing wrong.

Unchecked Writing
This Just In: I stopped using Grammarly; have you noticed? Plus, a deeper exploration into AI writing and my friend the em dash.
What I Did Different With This Book
This Just In: Launching a second edition wasn’t as simple as I thought it’d be, and I learned some lessons along the way.

Let’s Talk About Tools
This Just In: There’s no single tool that can do everything and it’s extremely frustrating.

Battle of the Book Builders
This Just In: I tried to format my book using Vellum and Atticus. Instead, I learned something about app design and limitations.

Does My Journal Need a Backup
This Just In: I took a lot of your suggestions to heart and gave Obsidian a try. What I found was a bigger question.

Journals Aren’t Forever
This Just In: After over 13 years, I’ve deleted the Day One journal app. Here’s what it helped me realize about software subscriptions.
How to Move to Ghost In 2025
This Just In: Own your own publication by launching a website running Ghost. It’s not as difficult as it sounds.

Tapestry Is Weaving the Future Web
This Just In: The Iconfactory’s smash new app is a return to the web’s roots and where we all need to head.
The Perils of Personal Platforms
What does it actually mean to leave the world of commercial platforms behind?
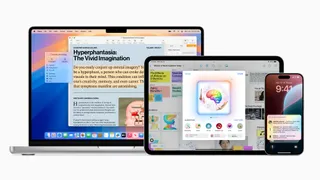
Are Apple’s Writing Tools the Right Stuff
This Just In: Apple Intelligence offers the boring version of AI I’ve hoped for, but is it helpful for writers?
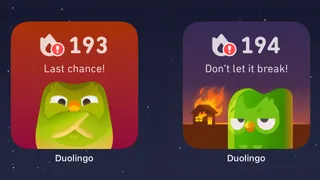
When Gamification Goes Awry
Writing days, health rings, Duolingo… there are more streaks than time.

New Phone Who Dis
New technology fuels a desire to create but can also be overwhelming and lead to unmet expectations.
Is Apple Intelligence the AI for the Rest of Us
This Just In: Apple’s forthcoming entry into AI promises a private, personalized AI, but will it increase AI slop?

Creation and Destruction Are Connected
This Just In: The act of creating something is more important than the act of publishing what is made.
Sending Emails Is Hard
This Just In: Google and Yahoo crack down on bad behavior; set your DKIM, DMARC, and SPF records now.
Why Make Anything if You Don’t Think It Will Be Great?
This Week In Writing, we discuss greatness and how chasing it is a possible and noble goal.
It’s Time for a Fresh Start
This Week In Writing, we talk about new Apple products, home renovations, and changes to the newsletter.
My Return to Journaling Failed Miserably
This Week In Writing, we talk about good intentions, rumored Apple products, and buying domain names

Why Haven’t You Enabled This Essential iOS Feature
I requested this feature a decade ago, it was added to iOS three years ago, and so many people haven’t turned it on.
How to Move Your Digital Brain From Notion to Reminders
I used Notion as a project management system but replaced it with Apple’s Reminders. Here’s how you can, too.

My Favorite Under-the-Radar iOS 16 Features
The new Lock Screen and battery indicator might get all the press, but there are better reasons to upgrade.

Spring Into the Best Twitter Client You’ve Never Heard Of
How does the Spring Twitter client by Junyu Kuang stack up to Tweetbot and Twitterrific?
Make Your Writing Space More Comfortable
This Month In Writing, we explore simple ways to improve your writing space and the best advice published in June.

The Curious Case of the 13” M2 MacBook Pro
Why does the 13” M2 MacBook Pro still exist, and what does it mean for the future of Apple’s laptop lineup?

Are You Organized?
This Week In Writing, we look at digital organization techniques to keep all of our drafts, research, and ideas safe.

Don’t Expect An Apple M2 Chip at WWDC
With the two-year transition to Apple Silicon complete, we know when to expect new products.

Apple Swung and Missed with the Studio Display
Want a bigger iMac? Too bad.
Got a Notion for freelancing?
Does the endlessly customizable Notion make freelancing easier, or is the tool’s neverending optimization a turn-off? Let’s find out!

Data Privacy and Mailing Hard Drives
Thanks to an affinity for films like Minority Report, Enemy of the State, and Anon, I take my data privacy seriously. Do you?

How Big Is Your Diction?
This Week In Writing, we break out the thesaurus to compare diction size and explore the power of unique words.

Are You Living Like The Jetsons?
We may not live like The Jetsons, but tools like Apple’s Shortcuts help us save time and make living in the real world more enjoyable.

You’re Drastically Underusing Shortcuts — Here’s Why
Now that Siri Shortcuts is available on macOS, the powerful app makes automating tasks in three common apps much easier.

One Easy Way To Eliminate Spam
Email sucks, but it doesn’t have to. Here’s how 33Mail, SimpleLogin, or Apple’s Hide My Email can eliminate spam and secure your privacy.

Do You Write For Accessibility?
This Week In Writing we want to ensure everyone has equal access to our writing. Here are ways to write for accessibility.

I Switched From 1Password to Keychain — Here's Why
Not only have I switched from 1Password to Keychain, but I’m not looking back

Free Tools For Accessible Writing
While I am not an expert, I learned a lot about accessible writing while redesigning my website. Here are the four free tools I used.

I’m Spying On You Right Now
You’re being watched. Can you feel it? As you read this post, little bots behind the scenes track you and your interactions. Creepy, right?

Even With Peacock, NBC Doesn’t Understand Streaming
I thought Peacock would be a hub of streaming Olympic content. Unfortunately, Peacock proved NBC doesn’t understand streaming.
How To Move Content From Medium to WordPress
Are you looking to move content from Medium to WordPress? You’ve come to the right place. Let me walk you through the process.

Black Widow Premier Access Proves Movie Theaters Are Obsolete
I paid $29.99 to not deal with other people. It was wonderful.

Write Every Day With Siri Shortcuts and Day One
Want to know how I developed a 3+ year daily writing habit? Follow this guide to build a Siri Shortcut, and you’ll write every day, too!

I Bought a Selfie Ring Light
One step in my journey to becoming an influencer/thought leader/whatever you want to call me

The Life-Changing Power of GTD For Freelance Writers
Evaluating Trello, ClickUp, and Notion to stay organized and productive
Level Up Your Productivity Through Budgeting
Do you know where your money goes? What about your time? Here are four rules for better writing.

Don’t Sleep on the New M1 Mac Mini
Apple’s latest base-model computer brings powerful performance at a bargain price.

Get In The Mood: Level Up Your Writing Soundtrack
Help your mind focus while having a little fun by setting up a custom writing playlist

This Just In: Bio Tracking
Do you know what your resting heart rate is?

This Just In: Apple Updates
Why I’m using Google Chrome again…
How I Write From Home
Invest in your comfort and your productivity will increase

What Happens When You Lose The Muse
Writing lessons from Jony Ive’s departure from Apple.

I Still Know All The Words to “The Sign”
What I learned fixing my iTunes Library.

Introducing SiriLibs: The First Mad Libs Style Game For Siri Shortcuts
Today, I’m releasing a new shortcut based on the class Mad Libs game for children: SiriLibs!

Siri Shortcuts: The Best Part of iOS 12
I’ve been playing with Shortcuts all week and the app is insanely powerful.

Tweetbot vs. Twitterriffic
The Battle of Twitter’s Third-Party Apps

I’m a Slave to My Wrist
Impulse Purchases Lead to Habit Changes